Getting started with GigaDevice: GD32H759 Evalboard
GD32H759 Evalboard (GD32H759I-EVAL).
The following article explains all necessary steps to create an Embedded Wizard UI application suitable for the GD32H759 Evalboard (GD32H759I-EVAL) from GigaDevice.
Please follow these instructions carefully and step by step in order to ensure that you will get everything up and running on your target. In case you are not familiar with Embedded Wizard, please read first the chapter basic concepts and the Quick Tour tutorial to understand the principles of Embedded Wizard and the GUI development workflow.
Prerequisites
First, make sure you have all of the following items:
Hardware components
★GD32H759 Evalboard from GigaDevice (GD32H759I-EVAL)
★USB cable to connect the board with your PC
★USB cable to connect the USART port of the board with your PC
Software components
★Embedded Wizard Studio
You can download Embedded Wizard Studio directly from the following link:
![]() EmbeddedWizard_Studio_x64-V15.00.msi
EmbeddedWizard_Studio_x64-V15.00.msi
Customers can also find all their licensed software packages in the Embedded Wizard Download Center (login required).
★Embedded Wizard Build Environment for GD32H759 Evalboard
You can download the suitable Build Environment from the following link:
![]() GD32H759-Evalboard-BuildEnvironment-V15.00.00.00.zip
GD32H759-Evalboard-BuildEnvironment-V15.00.00.00.zip
Customers can also find the latest version of the Build Environment and their licensed Platform Package source codes in the Embedded Wizard Download Center (login required).
★Optional: IAR Embedded Workbench
★Optional: Keil MDK-ARM
Installing Tools and Software
★Step 1: Install the latest version of Embedded Wizard Studio.
★Step 2: Unpack the provided Embedded Wizard Build Environment for GD32H759 Evalboard to your local file system (e.g. C:\GD32\GD32H759-Evalboard).
Embedded Wizard GUI Demos
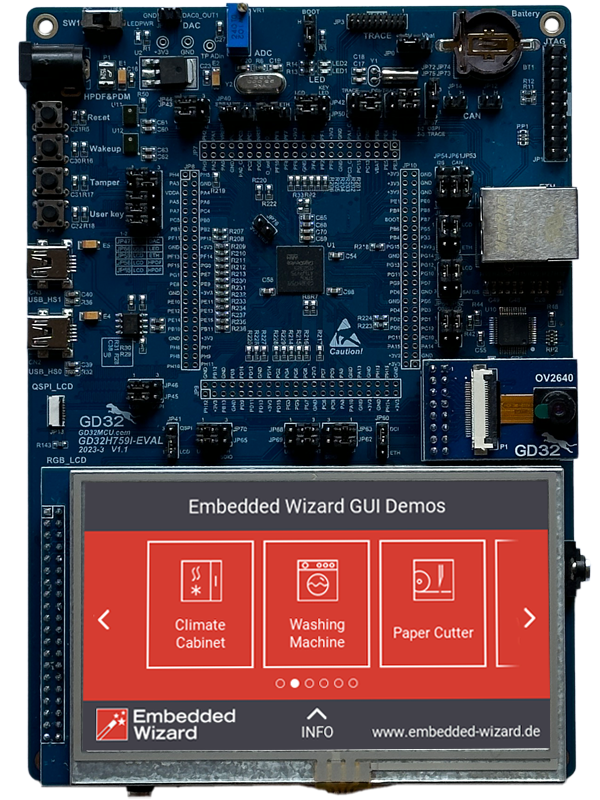
If you just want to run our GUI demos on your GD32H759 Evalboard without building the different examples, you can simply flash the binary file of the Embedded Wizard Master Demo.
The Embedded Wizard Master Demo combines a variety of examples within one huge demo application. It can be used for presentations and showcases. Each demo application can be activated from a common main menu. To return back from a demo application to the main menu, a small home button appears on top of every demo. Additionally, the Master Demo contains an auto-demo mode that presents one demo application after the other. The auto-demo starts automatically and stops as soon as the user touches the screen.
In order to flash the binary file to your target, please follow these steps:
★Connect your development board with your PC via USB (make sure to use the GD-Link USB connector).
★Execute the batch file FlashMasterDemo.bat: A console window will appear and the flash tool will download the binary file of the Master Demo.
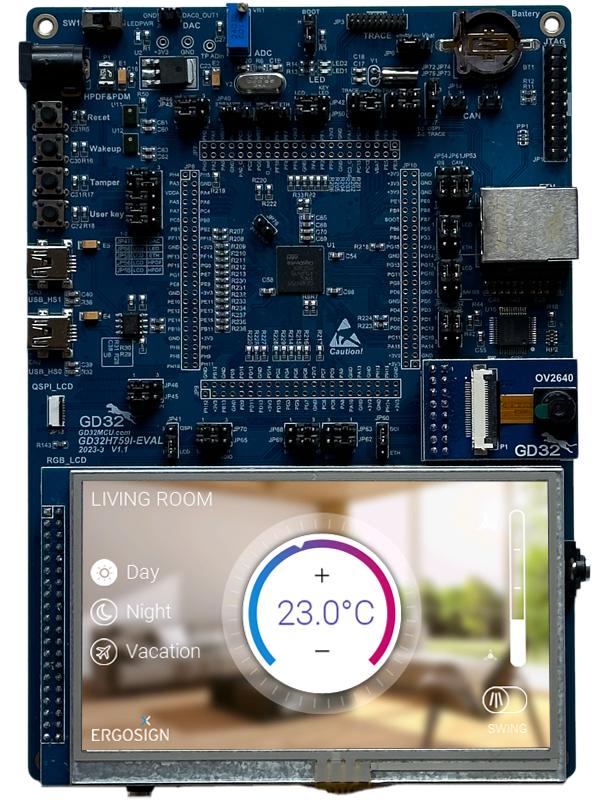
'Master Demo' running on GD32H759 Evalboard.
Exploring the Build Environment
The provided Embedded Wizard Build Environment for GD32H759 Evalboard contains everything you need to create, compile, link and flash an Embedded Wizard UI application for the GD32H759 target. After unpacking, you will find the following subdirectories and files:
•StartGccBuildEnvironment.bat - This script file is provided to start a windows command line to build your GUI applications for the target.
•\Application - This folder contains ready-to-use projects to compile and link an Embedded Wizard generated UI application. They are used for all provided examples and they can be used to build your own UI applications.
•\FlashDownload - This folder contains a script to load the created binaries into the flash of your target by using the GD-Link-Programmer tool.
•\GeneratedCode - This folder is used to receive the generated code from an Embedded Wizard UI project. All template projects are building the UI application out of this folder. You can create your own UI project and generate the code into the subdirectory \GeneratedCode without the need to adapt the project.
•\Project - This folder contains the prepared projects for GCC (make).
•\Source - This folder contains the files main.c and ewmain.c. There you will find the initialization of the system and the main loop to drive an Embedded Wizard GUI application. The file ewconfig.h contains general configuration settings for the target system, like memory ranges and display parameter and configuration settings for the Embedded Wizard Graphics Engine and Runtime Environment. Additionally, this folder contains the device driver C/H files used for the DeviceIntegration example.
•\Examples\<ScreenSize> - This folder contains a set of demo applications prepared for a dedicated screen size (480x272 pixel). Each example is stored in a separate folder containing the entire Embedded Wizard UI project. Every project contains the necessary profile settings for the GD32H759 target. For a complete overview and detailed descriptions of all available examples, including their features and usage, see Examples.
•\MasterDemo - This folder contains the binary file of the Embedded Wizard Master Demo application and a script file to flash the demo on your target. The Master Demo combines a variety of examples within one huge demo application. It can be used for presentations and showcases.
•\PlatformPackage - This folder contains the necessary source codes and/or libraries of the GD32 Platform Package: Several Graphics Engines for the different color formats (RGBA8888, RGB888, RGBA4444, RGB565, Index8 and LumA44) and the Runtime Environment (in the subdirectory \RTE).
•\TargetSpecific - This folder contains all configuration files and platform specific source codes. The different ew_bsp_xxx files implement the bridge between the Embedded Wizard UI application and the underlying board support package (GD32 hardware drivers) in order to access the display, the graphics accelerator, the serial interface and the clock.
•\ThirdParty - This folder contains third-party source codes and tools:
•\gcc-arm-none-eabi - This folder contains a subset of the ARM GNU toolchain to compile the examples.
•\Make - This folder contains a make tool to build the entire GUI application via command line.
•\GD32F4xx_Firmware_Library - This folder contains the necessary subset of the GD32 firmware used for the Embedded Wizard UI applications (HAL, BSP, drivers).
•\GD-Link-Programmer - This folder contains the GD-Link programmer tool to flash the binary on the target.
Creating the UI Examples
For the first bring up of your system, we recommend to use the example 'HelloWorld':
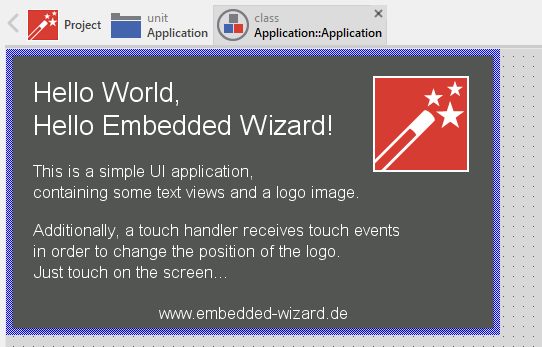
Example 'HelloWorld' within Embedded Wizard Studio.
The following steps are necessary to generate the source code of this sample application:
★Navigate to the directory \Examples\<ScreenSize>\HelloWorld.
★Open the project file HelloWorld.ewp with your previously installed Embedded Wizard Studio. The entire project is well documented inline. You can run the UI application within the Prototyper by pressing Ctrl+F5.
★To start the code generator, select the menu items - or simply press F8. Embedded Wizard Studio generates now the sources files of the example project into the directory \Application\GeneratedCode.
Compiling, Linking and Flashing
The following steps are necessary to build and flash the Embedded Wizard UI sample application using the GCC ARM embedded toolchain:
★Navigate to the top level of the Build Environment.
★Open StartGccBuildEnvironment.bat - as a result, a windows command line window should open. In case there are error messages, please edit the file and double-check the path settings.
★Now start compiling, linking and flashing:
make make install
If everything works as expected, the application should be built and flashed to the GD32H759 target.
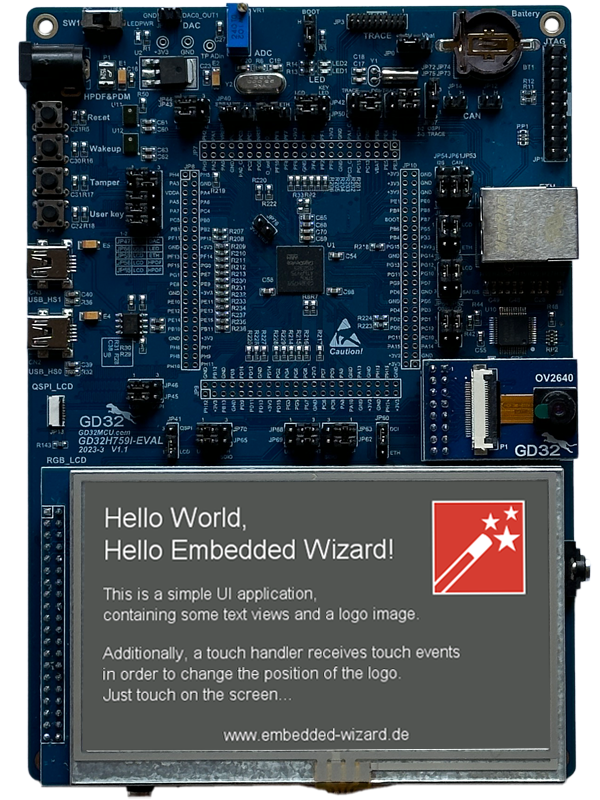
Example 'HelloWorld' running on GD32H759 Evalboard.
All other examples can be created in the same way: Just open the desired example with Embedded Wizard Studio, generate code and rebuild the whole application using simply:
make install
Creating your own UI Applications
In order to create your own UI project suitable for the GD32H759 target, you can create a new project and select the GD32H759 Evalboard project template:
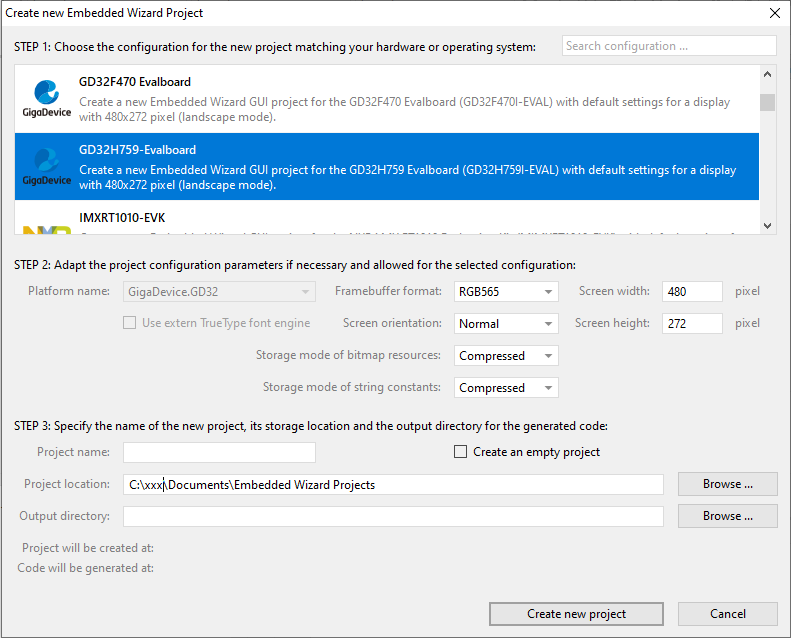
As a result you get a new Embedded Wizard project, that contains the necessary Profile attributes suitable for the GD32H759 Evalboard:
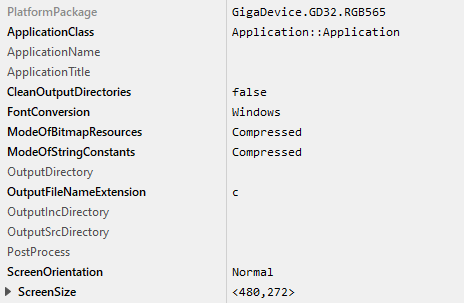
The following profile settings are important for your target:
★The attribute PlatformPackage should refer to the GD32 Platform Package.
★The attribute ScreenSize should correspond to the display size of the GD32H759 Evalboard.
★The attributes ModeOfBitmapResources and ModeOfStringConstants can be set to DirectAccess in case that the resources should be taken directly from flash memory. By default these attributes are set to Compressed.
★The attribute OutputDirectory should refer to the \Application\GeneratedCode directory within your Build Environment. By using this template, it will be very easy to build the UI project for your target.
★The attribute CleanOutputDirectories should be set to true to ensure that unused source code within the output directory \Application\GeneratedCode will be deleted.
★The attribute PostProcess should refer to \Application\Project\EWARM\EWARM_ew_post_process.cmd if you are working with IAR Embedded Workbench or to \Application\Project\MDK-ARM\MDK-ARM_ew_post_process.cmd if you are working with Keil MDK-ARM. In case of the GCC ARM embedded toolchain leave it blank
Now you can use the template project in the same manner as it was used for the provided examples to compile, link and flash the binary.
After generating code, please follow these steps, in order to build your own UI application:
★Start the batch file 'StartGccBuildEnvironment.bat'. Again, a windows command line window should open.
★Start compiling, linking and flashing:
make install
Most of the project settings are taken directly out of the generated code, like the color format or the screen orientation. Only a few additional settings can be configured directly within the Makefile, like the usage of the FreeRTOS operating system. All other settings can be made directly within the file ewconfig.h, which contains general configuration settings for the target system.
Console output
In order to receive error messages or to display simple debug or trace messages from your Embedded Wizard UI application, a serial terminal like 'Putty' or 'TeraTerm' should be used.
★Connect the USART port of your GD32H759 Evalboard with the PC via USB connection. Open the device manager to get the number of the installed COM port.
★Now you can open your terminal application and connect it via COMx with the following settings: 115200-8-N-1
During a successful application startup, the console displays the following information:
Initialize Display... [OK] Initialize Touch Driver... [OK] Initialize Memory Manager... [OK] Initialize Platform Package... [OK] Initialize Invocation Queue... [OK] Create Embedded Wizard Root Object... [OK] Create Embedded Wizard Viewport... [OK] --------------------------------------------- Embedded Wizard System Info --------------------------------------------- Target system GD32H759-Evalboard Color format RGB565 Build Environment version V15.00.00.00 Runtime Environment (RTE) version V15.00 Graphics Engine (GFX) version V15.00 MemoryPool address 0xC003FC00 MemoryPool size 33032192 bytes Framebuffer address 0xC0000000 Doublebuffer address 0xC1FC0400 Display size 480 x 272 Framebuffer size 480 x 272 Surface rotation 0 EwScreenSize 480 x 272 Graphics accelerator IPA Warp function support enabled Vector graphics support enabled Gradients support enabled Blur support enabled Mask support enabled Tint support enabled Bidirectional text support enabled Compression support enabled Index8 bitmap resource support enabled RGB565 bitmap resource support enabled Native bitmap resource support enabled Max surface cache size 0 bytes Glyph cache size 256 x 256 Max issue tasks 100 External Flash memory disabled Operating system bare-metal Toolchain IAR Embedded Workbench C-Compiler version 9060002 Build date and time Nov 24 2025, 08:43:16 ---------------------------------------------
This terminal connection can be used for all trace statements from your Embedded Wizard UI applications or for all debug messages from your C code.
Using IAR Embedded Workbench
IAR Embedded Workbench support is available exclusively for customers with a licensed Platform Package Source Code. The required project templates can be downloaded from the Embedded Wizard Download Center (login required).
If you want to use the IAR Embedded Workbench instead of the GCC ARM embedded toolchain, please follow these instructions:
The subdirectory \Application\Project\EWARM contains a template project that is commonly used for all provided Embedded Wizard examples. All Embedded Wizard examples will store the generated code within the common \Application\GeneratedCode folder.
The generated code of an Embedded Wizard example is imported automatically to the IAR Embedded Workbench project using the Project Connection mechanism.
To establish this automatic project import a post process has to be added to the Profile settings within Embedded Wizard Studio:
★Open the desired Embedded Wizard example project.
★Select the Profile and set the attribute PostProcess to the file ..\..\..\Application\Project\EWARM\EWARM_ew_post_process.cmd.
After the Embedded Wizard code generation the installed post process will generate a ewfiles.ipcf file, that controls the import to the IAR Embedded Workbench project.
After returning to IAR Embedded Workbench, the latest generated code and the suitable Embedded Wizard Platform Package will be imported to the IAR Embedded Workbench project (depending on the color format and the screen orientation selected in the Embedded Wizard Profile).
If the color format or the screen orientation was changed, please do a complete rebuild of the IAR Embedded Workbench project.
Using Keil MDK-ARM
Keil MDK-ARM support is available exclusively for customers with a licensed Platform Package Source Code. The required project templates can be downloaded from the Embedded Wizard Download Center (login required).
If you want to use the Keil MDK-ARM toolchain instead of the GCC ARM embedded toolchain, please follow these instructions:
The subdirectory \Application\Project\MDK-ARM contains a template project that is commonly used for all provided Embedded Wizard examples. All Embedded Wizard examples will store the generated code within the common \Application\GeneratedCode folder.
The generated code of an Embedded Wizard example is imported automatically to the Keil MDK-ARM project using the CMSIS PACK mechanism.
The following steps are needed to establish this automatic project import:
★Install Tara.Embedded_Wizard_Launcher.x.x.x.pack by double clicking. You will find the file within the subdirectory \Application\Project\MDK-ARM.
★Open the desired Embedded Wizard example project.
★Select the Profile and set the attribute PostProcess to the file ..\..\..\Application\Project\MDK-ARM\MDK-ARM_ew_post_process.cmd.
After the Embedded Wizard code generation the installed post process will generate a ewfiles.gpdsc file, that controls the Keil MDK-ARM project import.
In Keil MDK-ARM a dialog appears: "For the current project new generated code is available for import". After confirmation, the latest generated code and the suitable Embedded Wizard Platform Package will be imported to the Keil MDK-ARM project (depending on the color format and the screen orientation selected in the Embedded Wizard Profile).
If the color format or the screen orientation was changed, please do a complete rebuild of the Keil MDK-ARM project.
Custom specific hardware
In order to bring-up an Embedded Wizard generated UI application on your GD32H759 custom hardware, you can use the provided Embedded Wizard Build Environment for GD32H759 Evalboard as a template. For general information about porting Embedded Wizard to custom hardware, please refer to the article Custom Hardware Integration.
For GD32H759 Evalboard-based custom hardware, the following target-specific adaptations are typically necessary:
★System clock (ew_bsp_system.c) - Configure the system and peripheral clock according to your hardware. Please take care that your USART is connected to the selected clock source and configured correctly.
★USART (ew_bsp_console.c) - Adapt the USART configuration and pinout according to your hardware layout.
★Display (ew_bsp_display.c) - Adapt the file \TargetSpecific\ew_bsp_display.c to access the desired display driver (external display controller with own graphics memory). The GD32H759 features IPA hardware graphics accelerator for enhanced performance.
★Touch (ew_bsp_touch.c) - If your application requires touch support, you can integrate a given touch driver provided by the touch controller manufacturer or write your own. As a result the current touch position should be returned.
★Screen size - If the size of your display is different compared to the display of the GD32H759 Evalboard (480x272 pixel), please adapt the attribute ScreenSize of the UI project and the size of the framebuffer within the file ewconfig.h accordingly.
Release notes
The following section contains the version history of the Build Environment (including Graphics Engine and Runtime Environment) for GD32H759 Evalboard. These release notes describe only the platform specific aspects - for all general improvements and enhancements please see the Embedded Wizard release notes.
Version 15.00.00.00
★Using Graphics Engine (GFX) and Runtime Environment (RTE) V15.00.
★IAR Embedded Workbench and Keil MDK-ARM libraries removed from Build Environment to reduce package size. Project templates available as separate download (Download Center, customers only).
★Using GD32H7xx Firmware Library V1.1.0.
★Using Arm GNU Toolchain V14.3.Rel1.
★Using IAR Embedded Workbench 9.60.2, IAR C/C++ Compiler V9.60.2.399/W64 for ARM.
★Using Keil MDK-ARM Professional Version 5.43.0.0, ARM Compiler 6.24 (armclang).
★Known Issue: Binaries created with GCC (Arm GNU Toolchain) may cause flickering effects (depending on optimization level). It is recommended to use IAR instead.